
Equipment
ExLabs is equipped with some awesome video creation tools. That said, without a great idea, the tools are just tools. Anyone can learn to fly a drone, but you are setting out to fly your idea. Below you will find a brief description of some of the equipment available to you. You can download the user manual or learn more about each piece of tech by clicking on the images.
THE SONY A7SII
This is an incredible camera for filmmaking. So make the most of it by studying it. The Sony A7SII records in full 4K and can record at 120 FPS. The sensor is amazing in low light situations.


DJI AVATA
The DJI Avata drone is a state of the art, 4K immersive drone. It is a professional grade aircraft that can be used to capture images high above the ground, in tight spaces, at high stable speeds, and indoor operations. Click below to view the guide to operating the Avata.

tascam DR22-wl
The Tascam DR22-WL is a wifi enabled recording device with various settings that enable recording in different environments. It's simple to use and has a lot of great features so be sure to explore all of its capabilities.

Canon XA55
The Canon XA55 is one of our newest additions. It’s perfect for the run-and-gun videographer. Can also record longer that our 30 min time on the DSLR. Great in low light and paired with the Sennheiser mic, it can grab really low sounds.

nikon keymission
The Nikon KeyMission 360 camera is one of the newest 360 video and virtual reality cameras available today. It is waterproof and shock resistant and can be mounted like a GoPro on just about anything. The videos can be edited in Premiere Pro and uploaded to Facebook or YouTube, or viewed through VR Goggles.

GoPro Hero 5
The GoPro Hero 5 has much better features including image stabilization and multiple field of view modes than previous models. It's a great camera for capturing timelapse images as well as a camera that is water and shockproof.
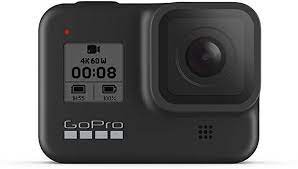
GoPro Hero 8
This camera is levels above the 5! Offering great image stabilization with higher frames per second and 4k capabilities. It is also shockproof and waterproof for the adventurous souls.

dji osmo
The DJI Osmo is a handheld camera with an independent stabilized gimbal and camera. The camera connects to your wireless device through wifi, like most all of the cameras you will be operating. The Osmo allows for very smooth shots that mimic a traditional steady cam rig.

Genaray SpectroLED Essential 360 Daylight LED 2-Light Kit
LED lighting kits are great for lighting subjects for interviews and for lighting scenes in general. Here's a link to getting the most from LED lighting.

DR-10L TASCAM
A beautiful device that captures sound from our subjects perfectly. A must for those being interviewed. Just feed the lavalier mic up the shirt and around the collar, then hook the body to the back of the waste band. Make sure the record button is activated and the time stamp is rolling. You are in for some lovely sound capture.
Tricks and Tips
Here are some tips and tricks with regards to using the equipment in the best ways possible.
Connectivity
Most all of the camera equipment you'll be using is connected through wifi and your smart device. The smart device should be either a smartphone or tablet with IOS or Android. You will need to download the appropriate app for each camera. DJI's app is called DJI Go for the Osmo or DJI Virtual Flight for the drone. The Nikon Key Mission App is called Snap Bridge. All apps are available through Google Play or the Apple App store for free. Once downloaded you will need to open the app and connect the camera to wifi. (Note, the wifi connection is simply connecting the camera to the phone. You do not have to be connected to the internet and in most cases the wifi connection between your device and the camera will disable wifi connectivity with the internet.)
DRONE operation (please read carefully)
Operating a drone can be an awesome experience and a powerful tool with regards to filmmaking. That said, drones are highly technical pieces of camera equipment and must be taken seriously to avoid damage to the drone and to ensure the safety of others. The follow tips will help you to get the shots you want and get the drone back home.
1. Connecting the drone and Calibration -
When operating the drone follow these steps, exactly.
Review the manual.
Always make sure you have a fully charged battery.
Make sure there is a micro SD in the drone.
Turn on your tablet/phone and then turn on the remote. Pair the remote and device in the wifi settings and then open the appropriate app.
Then turn on the drone.
Make sure when you turn on the drone that you are away from any large metal objects and magnets. When turning on the drone make sure you don't move it and that it is on a flat surface. (You do not want interference with the propellers and surface, i.e. grass.) You will then need to perform a calibration of the drone (if required) by following the on-screen instructions. Never fly the drone before properly calibrating it each time you fly. The calibration will help set the home point in case the drone has an emergency and needs to return to home. Before flying you should make sure you set a return to home height and that there are no obstructions between where you want to fly, and where the drone will come home. Ie. NEVER launch underneath a tree or close to a structure, because it will come back and crash into the tree if it auto returns to home.
2. General Drone Tips
Before operating the drone it's important to think about a few things.
Look at the KP Index and weather. The KP Index is a measure of solar storm activity in the atmosphere. You can download an app called Hover here that will show you the KP Index and weather. If the KP index is above a 4 it is not safe to fly.
If the wind is above 20 mph it is not safe to fly either. (Each drone as a wind speed to consider. Please read the manual before operation).
Always keep a straight line of sight with the drone. If you cannot see the drone then the drone cannot see your remote controller and may lose communication.
Avoid flying from under trees or near large metal objects. Drones do not like either of these things.
Always fly in GPS mode and make sure you have at least 9 satellites connected on the remote.
Do not fly in sport or ATTI mode.
If a warning appears on the app, regard it cautiously and proceed bring the drone back to the home point.
It is best practice to always fly with a spotter (someone who watches the drone in the air) who can tell you if the drone is getting close to hitting anything, as you may be focused on the screen and picture that is being captured.
3. Filming Tips
In general the best drone shots are very dynamic and help tell a story. Anyone can film with a drone but to get the best output it helps to have your shots well thought out before hand. So, plan your shots. One of the most important aspects of drone photography is to not have the camera make quick jerking movements. Ideally you will want nice slow moves without the camera quickly adjusting.
Always make sure the color is balanced well and that the frame rate is adjusted to what you desire, along with the image resolution. Higher frame rates mean that footage will be able to be put into slow motion but the footage will not be as high res. The highest resolution for all of our cameras is 4K, which means 4000 pixels in dimension. When we shoot at higher speeds the resolution drops because we are capturing more data in the camera at a faster speed and the processor has to keep up. Try to keep your video resolution above 720p.
And don't forget to hit record!